I think I have reached that stage when I can proudly state, smugly, 'this post is the result of popular demand', even though it's been this one friend who demanded. But still, that counts, right? Here you go Gunsheen! Sorry to make it so late. :P
Papier mache has been fascinating for me for quite some time. If you'd remember, more than two years ago, I posted about a wacky mask I made during vacations, using the layering papier mache technique! The mask hangs still solid (albeit among frequent cobwebs - just slight ones) on a wall in my room. ^_^ God, re-reading that post brought back memories of an innocently awesome time. *sighs*
Anyway, this time, I decided I'd go with the pulp technique and make something cute and lovely. I don't honestly remember where I get such ideas from, but this just happened. I was also looking forward to making the pulp. Y'know, the gooey gooeness of it? I Googled some, YouTubed lots and basically ended up with lots of raw material and clicked pictures step by step because I really wanted to make a blog-post-tutorial! Let us, finally, 'are we all settled down?', begin. :P
This post would have examples of bangles and a bowl I made for a friend. Here's how the final product(s) looked:
 |
| Pretty and colorful, right? :D |
To make papier mache objects, you need:
 |
| Some stuff |
1. Paper (of course!): It can be newspaper, kitchen towel paper, computer printing paper or even toilet paper! Although the best kind to use in the pulp technique is plain old newspaper.
2. Glue
3. Flour
4. Salt
5. Mixing bowls (preferably plastic you won't need later)
6. Mixer/Grinder/Hand-held grinder
7. A stove (just for the initial heating)
8. Water
9. Your creativity, I suppose. And patience.
Step # 2: Making the pulp
This is the most important step because the pulp will ultimately determine the quality and strength of your product (in this example, a bangle).
- Cut small pieces of newspaper and collect them in a bowl. You can use a big enough container and fill the newspaper up to the top, because it's anyway going to be mashed into a pulp and hence, reduced in size. Make sure to cut as small pieces of the paper you can. It's easier to work with, later on. However, use your own idea of the quantity of pulp you wish to make. I made enough for 6 bangles and a whole bowl made of paper! Since the pulp (according to what I know) won't last for more than a couple of days in the same gooey freshness, you could simply use it to shape different objects within those two-three days and let them dry for the next few days.
 |
| Pieces of paper. |
- Add hot water to the paper in the bowl. Immerse all the paper completely, and let it stand overnight.
- The next day, transfer the now-soggy paper into another bowl, or simply drain the excess water from the original bowl. Break the wet paper pieces into even smaller, stickier, mashed up pieces. Keep enough water for you to use it in a mixer/grinder. I used a hand-held grinder to further make the pulp into goo. (Just in appearance)
 |
| Move your head 90 degrees to the right! I tried thrice to straighten it, I promise. |
- Use a sieve to remove excess water. The pulp should not be too dry, but it shouldn't be liquidated either. You'll know it when you do it. Just keep a little bit of water in it and get rid of the rest.
- Now transfer the soft pulp (no, it's not ready yet!) into a plastic bowl that you'd use to store it for the time you'd be working. Then take a tube of fevicol, hold it over the mashed up paper and squirt. To make it less boring, I prefer making spirals in white over the grey while squirting. Do it liberally.
- Add half a cup of flour. At first, I hadn't known the wonders of adding flour. My pulp was too soft and wasn't just sticking together when my eleven year old niece came up and asked me to add flour. Talk about smart kids! Flour helps stick the paper together, adds substance, and basically is something you cannot do without. Fevicol is awesome (as the ads say) but not enough for this pulp!
- Add half a spoon of salt. It does nothing more than ensure/prevent/delay fungus or whatever on the pulp so your project/object lasts longer!
- Now, the best part! Put your hands in the pulp: all sticky and scratchy, and mix it all together. Keep on doing it for a good few minutes till you feel the pulp is similar to soft clay and can be shaped into something. (I had made a video for it, but now it's not in the archives!) A good way to know whether the pulp is ready yet, is to take a bit of it and roll it into a ball. If it becomes a perfect, round shape, not breaking away, you're good enough to go forward. If not, consider adding a bit more flour and glue.
 |
| This ball seemed good enough |
Your pulp is ready!
Step # 3: Making shapes of objects
What is your project? I made some bangles and a bowl for a friend. Let's begin with the bangles.
- It's best to have a mold to help with the circular shape. I used that thin wire we used in school when making flowers (don't remember what it's called), shaped it into a circle, twisted the ends together and it was ready! After that, use the pulp and put it across the mold, as shown in the picture below. You'd need to spend some time on the shaping of these bangles, depending on how you want to make them: what breadth or shape (circular, flat).
 |
| The initial phase of putting pulp across the wire |
- Once you have shaped them all, you simply need to leave them to dry for three-four days, till you feel they're solid enough to get painted!
 |
| All those circular ones for bangles! |
You can use sandpaper to rub over the molds/shapes to make them smoother if little bumps etc disturb you. I like the imperfectness of the shapes, so I don't use that a lot.
For the bowl:
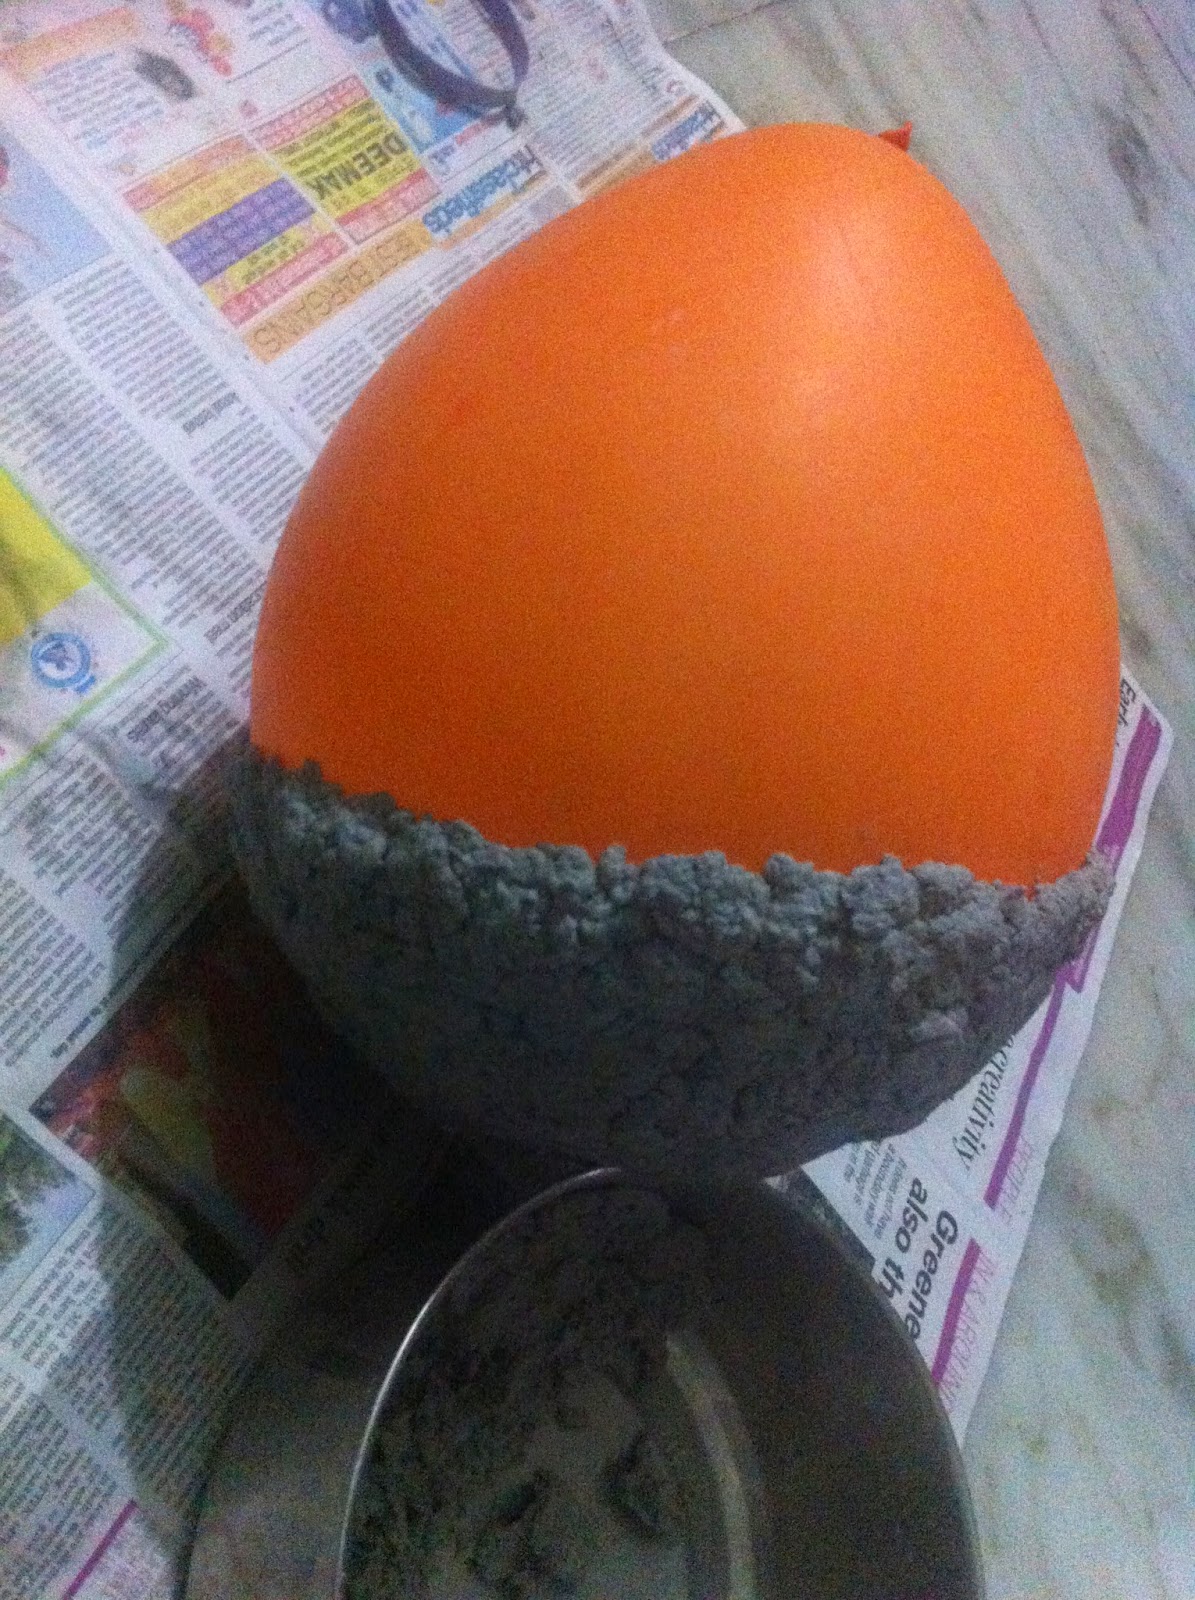
- I used a balloon to act as a mould here. The base of the balloon is round, and you can stick your pulp on to the base and leave it to dry for the same number of days as the bangles.

Let it stay like this, attached with the balloon till the time you're ready to use it. The balloon would pop off on its own, or you could use a pin. Also, the outer surface here was pretty rough. If you prefer smoother surfaces, you could look up videos for pulp-making and see how to make them really soft. Most of them are by people residing in other countries and some ingredients don't match, hence, I couldn't make it smoother. If you find a way, let me know!
Step # 4: Painting and decorating
Now your shapes are ready to be turned into useful, colorful, pretty objects you can gift or use to decorate your home! I used poster colors to create a basic color paint on the shapes, and then added glitter, or embellishments or other paint to make simple designs.
 |
| Base colors! |
 |
| Golden paint added with cotton, to give an effect of .... well, something ancient :P |
 |
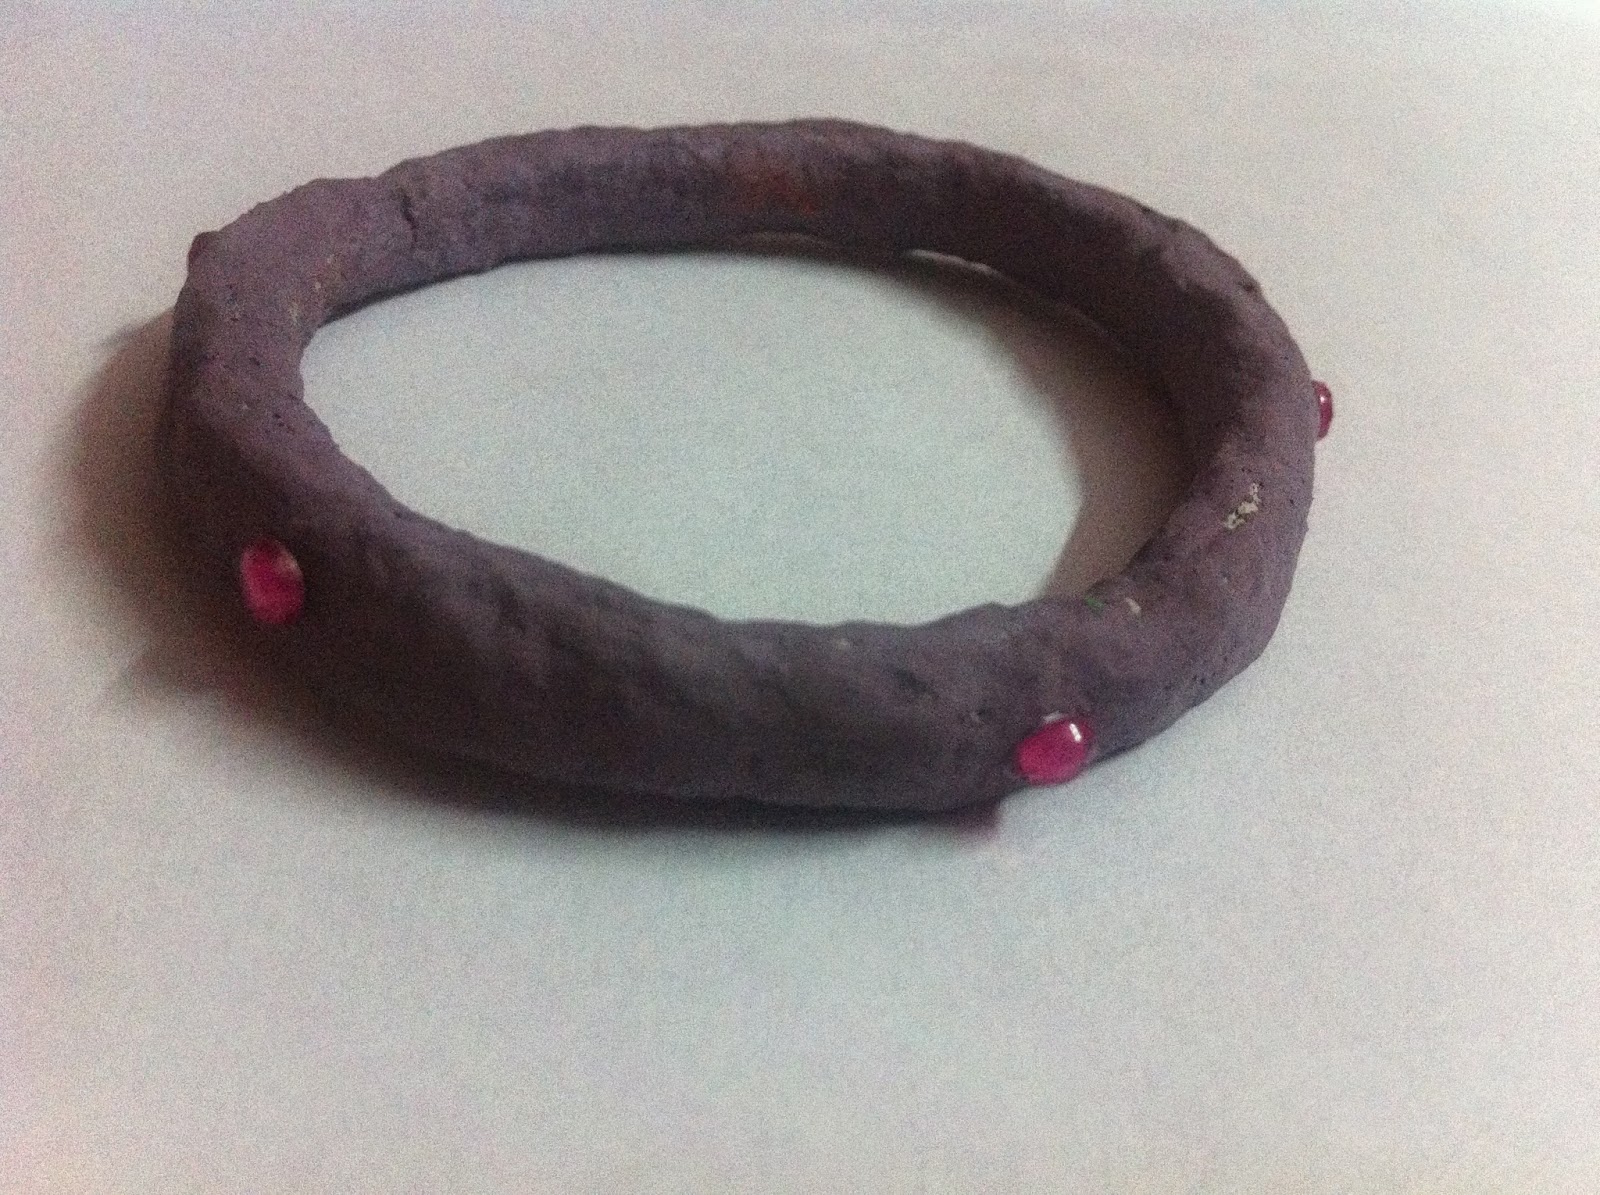
| Pink decorative gems stuck with fevicol. This one was my favorite of the lot! |
 |
| Simple stripes added with white poster color |
For the bowl:
A lot, and I mean A LOT of golden paint was used on this. Basically, I didn't have enough poster color for one big bowl, and the golden, shiny paint left over from the time I painted the walls of my room looked like the perfect solution! I'm actually quite proud of it. It did look good. :D
 |
| Before |
 |
| After! |
Step # 5: Finishing
Most of the stuff can be left like that once you're done with decorating it. However, in some cases when you want to extend the life of your creative pieces, you can add a coat of varnish to the items and preferably leave them to dry for a couple of days. Adding this prevents them from getting spoiled from water. Kind of like makes them water-proof, although I haven't seen the proof of it, having sent those off before the varnish coat even dried properly!
 |
| End result :) |
What do you think? Like it? Do these look like something you'd try? :D
If you have any questions, although I don't claim to be anywhere close to good at it, you can still ask me. :P


Close to good? You're awesome at it!! :D
ReplyDeleteI know this guide was not for me but given my interest for anything creative, I would love to try this. And after your tutorial, I can almost make it by heart. It was so good a tutorial.
It wouldn't hurt if you changed the title of this post to 'Dummy's guide to making papier mache gifts' cause I doubt there would be a person who wouldn't be able to make a papier mache something after going through this tutorial ;)
I loved the idea of trying and making something with the help of this post as much as I loved reading this post. Wishing you make many more fun and interesting DIY tutorials in the future :D
Keep making. Keep writing. :D
Heylo ji!
DeleteWhat excitement :D
You can surely use the same technique to make anything, I suppose :) Thanks for your lovely, motivating comment! :D I hope you do make something!
Yep, I guess I'll post another tutorial if and when I make something else!
Thankk youu! :)
Ashna! THIS.IS.AWESOME.
ReplyDeleteBangles! ^_^ I am definitely going to try this. Thankfully, the raw materials are something available in abundance. I'd love to do this.
And the way you presented the tutorial, makes this and you awesomer! :D
Thanks a lot for sharing!
Hi!! :D
DeleteSo glad to see your excitement :D It'd be great if you enjoy doing it too and make something super pretty! ^_^ The best thing about it is that you can mould the pulp into any shape you want, so basically it's good for sculpting too! That's huge for me, though, so I haven't tried it yet. Have fun! :D
Oh wow you are so creative girl :P surely trying it as soon as college allows :P
ReplyDeleteP.S: I tried really hard to remember what those flowers we use to make in craft class called but no luck :/
Hi Pratibha! Thanks for your lovely comment, and more so for trying to remember :D I guess we just go to a craft shop and ask for silver wire used to make stockings-flowers? :P
Delete