Read THIS First ..

Read THIS First..
Each word on this blog is the original creation of the writer. You better not copy it!
No comment is directed towards any individual/group.
Happy Reading!

Showing posts with label Creating. Show all posts

Monday, April 4, 2016

#4: Night dreamer

In a timeless place, no awareness of night and day,
The conscious awakens, threads of pictures,
scenes, moments, feelings, breaking through the surface.

Eyes don't open, for threads begin running loose,
Already losing a dream or two,
Quickly recalling the ones that remain,
Thinking them over and over again.

Hands reach out to the spiralled-together paper,
Tucked next to the pillow, pencil in place,
Readied in the night.
Hands scrawl memories, eyes open merely a shadow,
Mind rushing through dreams, about adventures, laughter and flowery meadows.

Together the papers get thicker each year,
Bearing dreams of a collector,
With no sure purpose, other than to remember,
There's a world wholly created, a world of one's own,
That's as beautiful and ugly,
As the one the body owns.

***
This got thought-up while I was going through a notepad I had kept for a short while, intermittently, to record dreams. To say I was astonished would be an understatement. It was full of WEIRD scenarios with the most unusual characters (Batman's Joker, people from my junior school I haven't thought about in years, Dracula, people as vampires, friends conjuring up spells using wands--I managed Lumos!!--my childhood toy pygmypuff, Frankenstein's creature, to name a few). The best thing was the way I'd written them down. Good sentences that I might not have managed in wakefulness. Straight in lines, despite being in the dark, eyes nearly closed. Am I awesome or what!?

In case this is the first NaPoWriMo poem you're reading on this blog, check out the NaPoWriMo website here to know about it.

I'm also in a personal, very healthy competition with this friend (click here) whose writing makes me want to think hard before I write, and to write the very best, because that is what he does. Trust me, (because I'm an editor) there's an undiscovered gem. 


Sunday, August 3, 2014

Papier Mache Tutorial: Making Bangles! Or anything else, basically.

I think I have reached that stage when I can proudly state, smugly, 'this post is the result of popular demand', even though it's been this one friend who demanded. But still, that counts, right? Here you go Gunsheen! Sorry to make it so late. :P

Papier mache has been fascinating for me for quite some time. If you'd remember, more than two years ago, I posted about a wacky mask I made during vacations, using the layering papier mache technique! The mask hangs still solid (albeit among frequent cobwebs - just slight ones) on a wall in my room. ^_^ God, re-reading that post brought back memories of an innocently awesome time. *sighs*

Anyway, this time, I decided I'd go with the pulp technique and make something cute and lovely. I don't honestly remember where I get such ideas from, but this just happened. I was also looking forward to making the pulp. Y'know, the gooey gooeness of it? I Googled some, YouTubed lots and basically ended up with lots of raw material and clicked pictures step by step because I really wanted to make a blog-post-tutorial! Let us, finally, 'are we all settled down?', begin. :P

This post would have examples of bangles and a bowl I made for a friend. Here's how the final product(s) looked:
Pretty and colorful, right? :D
Step # 1: Collecting raw material
To make papier mache objects, you need:

Some stuff
1. Paper (of course!): It can be newspaper, kitchen towel paper, computer printing paper or even toilet paper! Although the best kind to use in the pulp technique is plain old newspaper. 
2. Glue
3. Flour 
4. Salt
5. Mixing bowls (preferably plastic you won't need later)
6. Mixer/Grinder/Hand-held grinder 
7. A stove (just for the initial heating)
8. Water
9. Your creativity, I suppose. And patience. 

Step # 2: Making the pulp
This is the most important step because the pulp will ultimately determine the quality and strength of your product (in this example, a bangle). 

- Cut small pieces of newspaper and collect them in a bowl. You can use a big enough container and fill the newspaper up to the top, because it's anyway going to be mashed into a pulp and hence, reduced in size.  Make sure to cut as small pieces of the paper you can. It's easier to work with, later on. However, use your own idea of the quantity of pulp you wish to make. I made enough for 6 bangles and a whole bowl made of paper! Since the pulp (according to what I know) won't last for more than a couple of days in the same gooey freshness, you could simply use it to shape different objects within those two-three days and let them dry for the next few days.

Pieces of paper. 
- Add hot water to the paper in the bowl. Immerse all the paper completely, and let it stand overnight.

- The next day, transfer the now-soggy paper into another bowl, or simply drain the excess water from the original bowl. Break the wet paper pieces into even smaller, stickier, mashed up pieces. Keep enough water for you to use it in a mixer/grinder. I used a hand-held grinder to further make the pulp into goo. (Just in appearance)

Move your head 90 degrees to the right!
I tried thrice to straighten it, I promise.
- Use a sieve to remove excess water. The pulp should not be too dry, but it shouldn't be liquidated either. You'll know it when you do it. Just keep a little bit of water in it and get rid of the rest. 


- Now transfer the soft pulp (no, it's not ready yet!) into a plastic bowl that you'd use to store it for the time you'd be working. Then take a tube of fevicol, hold it over the mashed up paper and squirt. To make it less boring, I prefer making spirals in white over the grey while squirting. Do it liberally. 

- Add half a cup of flour. At first, I hadn't known the wonders of adding flour. My pulp was too soft and wasn't just sticking together when my eleven year old niece came up and asked me to add flour. Talk about smart kids! Flour helps stick the paper together, adds substance, and basically is something you cannot do without. Fevicol is awesome (as the ads say) but not enough for this pulp!

- Add half a spoon of salt. It does nothing more than ensure/prevent/delay fungus or whatever on the pulp so your project/object lasts longer!

- Now, the best part! Put your hands in the pulp: all sticky and scratchy, and mix it all together. Keep on doing it for a good few minutes till you feel the pulp is similar to soft clay and can be shaped into something. (I had made a video for it, but now it's not in the archives!) A good way to know whether the pulp is ready yet, is to take a bit of it and roll it into a ball. If it becomes a perfect, round shape, not breaking away, you're good enough to go forward. If not, consider adding a bit more flour and glue.

This ball seemed good enough
Your pulp is ready!

Step # 3: Making shapes of objects
What is your project? I made some bangles and a bowl for a friend. Let's begin with the bangles.

- It's best to have a mold to help with the circular shape. I used that thin wire we used in school when making flowers (don't remember what it's called), shaped it into a circle, twisted the ends together and it was ready! After that, use the pulp and put it across the mold, as shown in the picture below. You'd need to spend some time on the shaping of these bangles, depending on how you want to make them: what breadth or shape (circular, flat).

The initial phase of putting pulp across the wire
- Once you have shaped them all, you simply need to leave them to dry for three-four days, till you feel they're solid enough to get painted!

All those circular ones for bangles!
You can use sandpaper to rub over the molds/shapes to make them smoother if little bumps etc disturb you. I like the imperfectness of the shapes, so I don't use that a lot. 

For the bowl:
- I used a balloon to act as a mould here. The base of the balloon is round, and you can stick your pulp on to the base and leave it to dry for the same number of days as the bangles. 
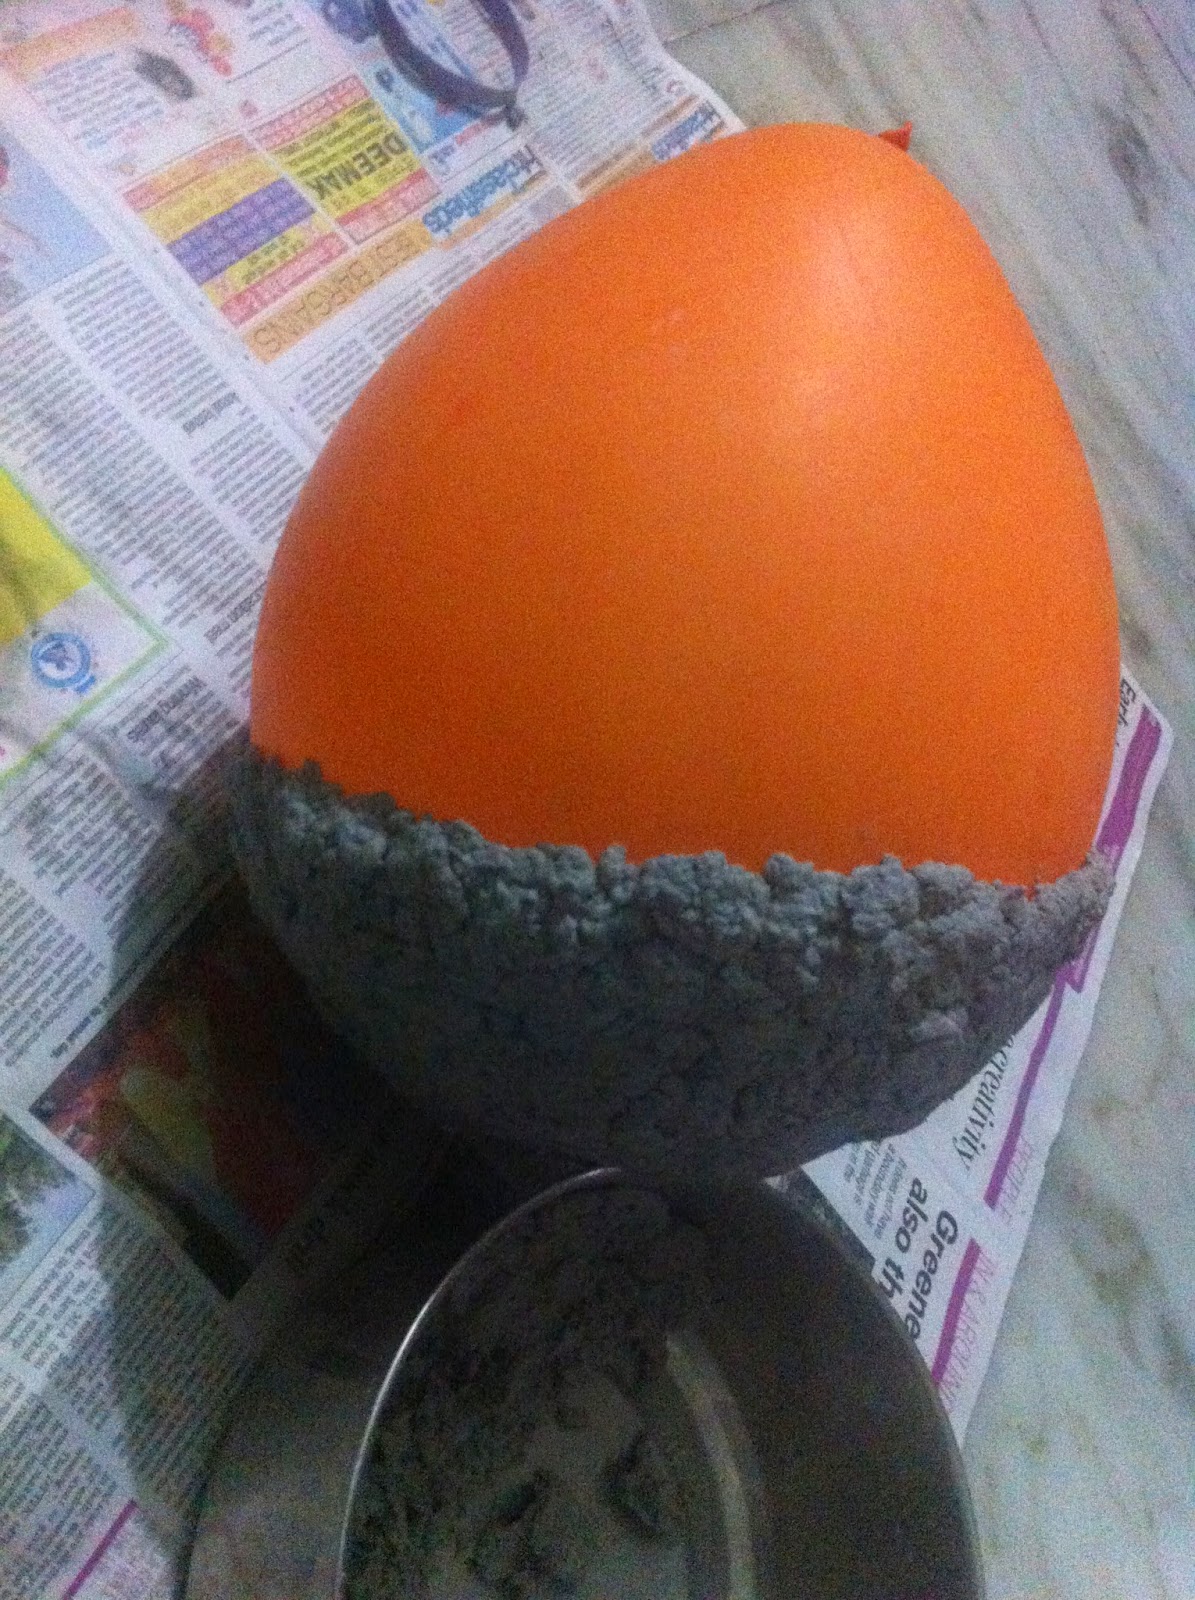


Let it stay like this, attached with the balloon till the time you're ready to use it. The balloon would pop off on its own, or you could use a pin. Also, the outer surface here was pretty rough. If you prefer smoother surfaces, you could look up videos for pulp-making and see how to make them really soft. Most of them are by people residing in other countries and some ingredients don't match, hence, I couldn't make it smoother. If you find a way, let me know!

Step # 4: Painting and decorating
Now your shapes are ready to be turned into useful, colorful, pretty objects you can gift or use to decorate your home! I used poster colors to create a basic color paint on the shapes, and then added glitter, or embellishments or other paint to make simple designs. 

Base colors!
These four were decorated differently.

Golden paint added with cotton, to give
an effect of .... well, something ancient :P

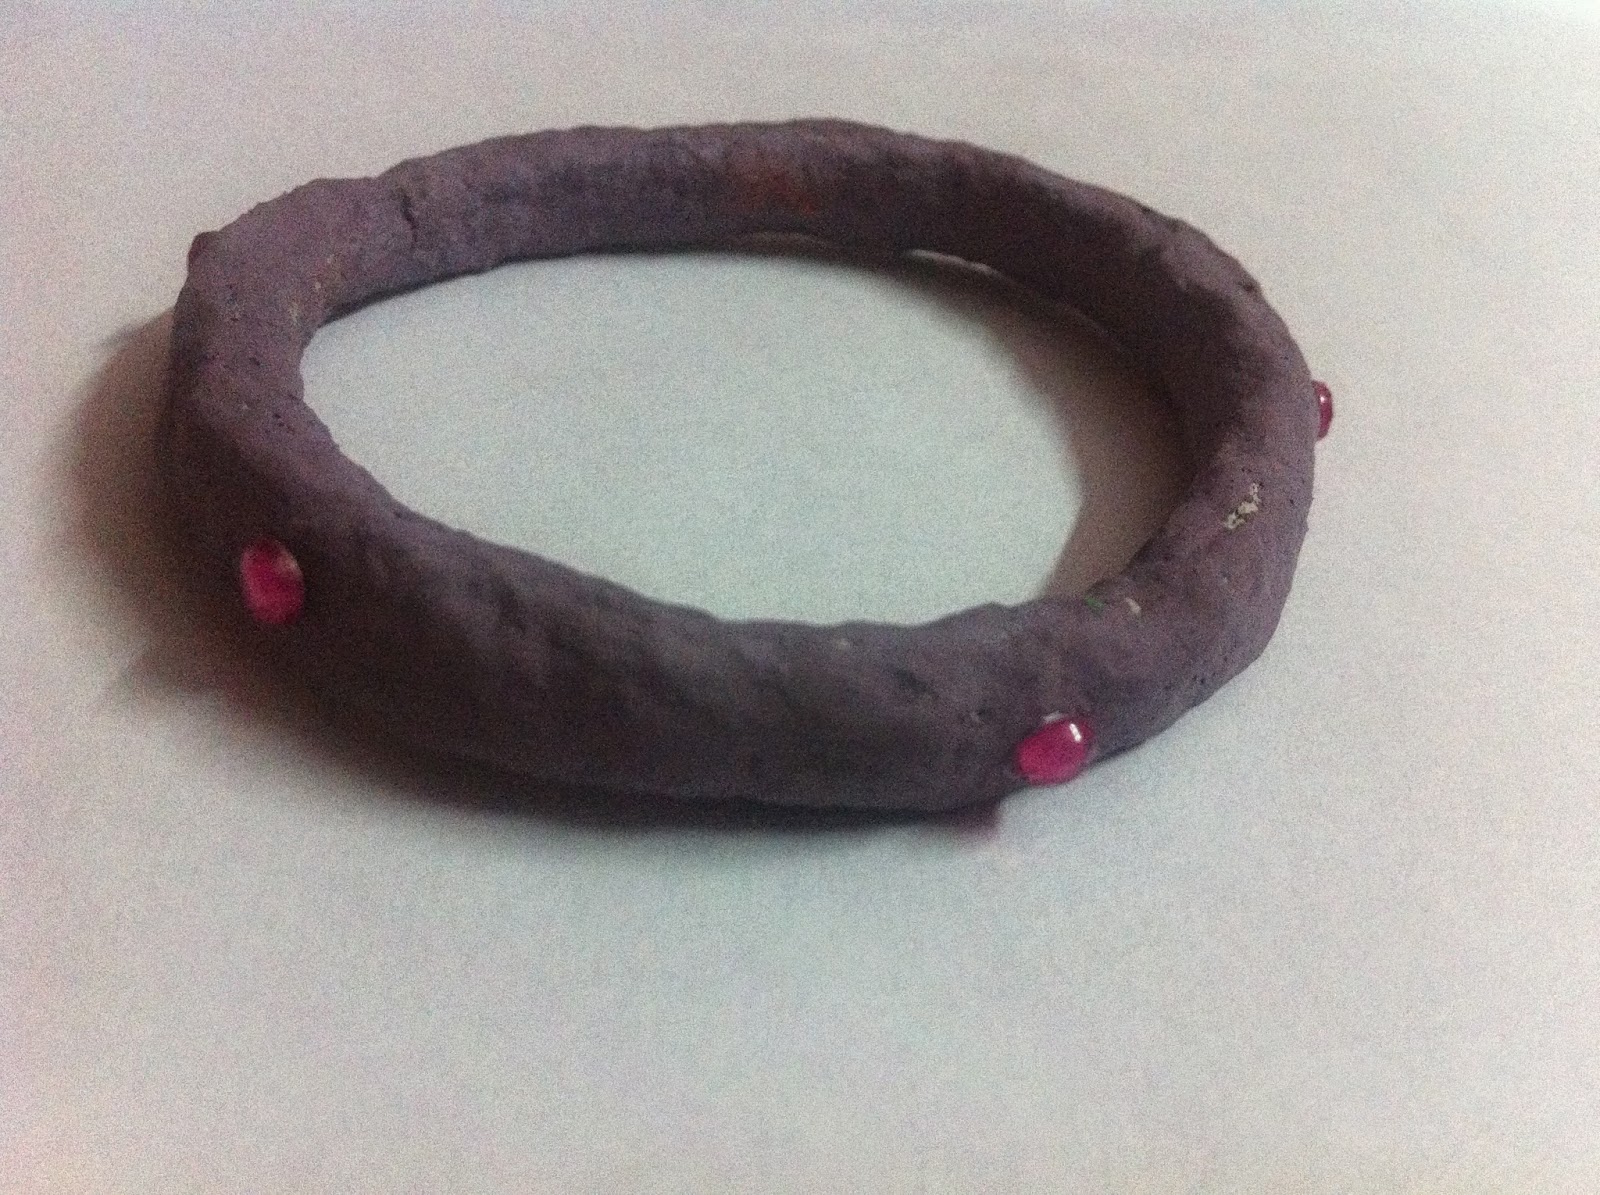
Pink decorative gems stuck with fevicol.
This one was my favorite of the lot!

Simple stripes added with white poster color
For the bowl:
A lot, and I mean A LOT of golden paint was used on this. Basically, I didn't have enough poster color for one big bowl, and the golden, shiny paint left over from the time I painted the walls of my room looked like the perfect solution! I'm actually quite proud of it. It did look good. :D

Before
After!


Step # 5: Finishing
Most of the stuff can be left like that once you're done with decorating it. However, in some cases when you want to extend the life of your creative pieces, you can add a coat of varnish to the items and preferably leave them to dry for a couple of days. Adding this prevents them from getting spoiled from water. Kind of like makes them water-proof, although I haven't seen the proof of it, having sent those off before the varnish coat even dried properly!

End result :)
What do you think? Like it? Do these look like something you'd try? :D

If you have any questions, although I don't claim to be anywhere close to good at it, you can still ask me. :P


Wednesday, December 4, 2013

Paintgirl Chronicles # 3: Designing and Finishing!

For those who remember, my walls got painted on October 13! I'm just posting this more than 1.5 months late. Apologies, apologies. For the new smarties who're now reading my blog, I utilized my Autumn break to paint two walls in my room. All by myself (helped by my family, of course). Thanks, I know I do really cool stuff. 8|

This is the third and the final part of the series (you can see the previous parts here and here). I mean, I was so exhausted when it was finally done, that I had no energy left to post about it. It's okay. Even though Paintgirl has amazing powers, she can run out of them sometimes. And then college re-opened and you know the rest. Writer's block, etc etc. Anyway, coming to the awesome part, I love the new walls. Not only are they painted in pretty shades of pink, we designed a tree at the intersection of those walls too! I can certainly certify it with a guarantee stamp that painting three coats each on two walls over two-three days won't make you feel as tired and exhausted as painting a tree for three hours straight would.

Paints and colors: We used oil paints, the kind usually reserved for painting on wooden and iron surfaces. Don't ask why. The Paint bhaiya said they'd be good to use and I could just trust his judgment. It was fun to work with, true, but since they are 'hard' and thick, they take more efforts. Plus, you'd have to use thinner brushes for painting leaves and outlining and the details, so it'd take even more time and effort. But I think I get why he suggested oil paints. They stick well and don't leak, which the normal paints would have done. Lesson to be learned: Always trust those who are making their living through a certain trade. They do know it well. ^_^ 

Enamel paints and stainers
Coming to colors, we had black and white enamel paints, along with brown and green stainers (as you can see in the above picture). These stainers can be mixed in the white enamel in any quantity you prefer, depending upon the shade of the color you want. For example, I had two different containers for light brown (with a little less amount of stainer mixed in white enamel) and one for a darker brown. Similarly, two shades of green (considering a mono green shade for all leaves would be boring!). 

Making the design: If it isn't too complex a design, you can straightaway stroke with your brush! But if you have any sliver of doubt and don't want to waste your three-days' hard work labor by making a wrong stroke, you may make a pencil design first as a base for the paint and brush. I tired making it too, but then my childhood's awesome creative avatar took over and went beyond the pencil stencil and made strokes on its own. I knew it's going good when mom entered after about an hour and exclaimed an appreciative and incredible "Wow". :D Although, you would always need someone else to stand at a distance and tell, because being on a ladder and being inches away from the design, you wouldn't really know about the overall structure. 

I made the tree trunk using the light colored brown, and then the branches, adding light green leaves at intervals. Then I mixed more stainer to have a darker green and made dark green half-boundaries on the leaves. The previous day on impulse, I had got some pretty golden paint and on another impulse, painted the other half of the leaves' border with gold. It looked quite good! I was exhausted and finally slumped back, not wanting to do any more, abandoning my plans of making those concentric circle designs on the trunk. My mom, with a little help from dad the next morning, secretly put an outline on the trunk and branches, making it look perfect and complete. What-e-morning surprise! :D


Overall! :D
                                 
Finishing: That was the last day of my holidays and we didn't have any time to do more, so the day was spent cleaning the floors, and other places where random paint was spotted. A few days later the bookshelf was put back and the room returned to it's part-messy normalcy. And then I had a lot of awesome gifts from awesome friends that would be framed and put up on the dark colored wall, which would make this look even more cool! :D

^_^
Basically, this is how it looks now. What do you think of it? ;)  


Sunday, July 7, 2013

Notebook-ing Memories!

There’s this thing about me: I like notebooks. All kinds of notebooks, especially those which look cute and colorful! As a kid I always loved pretty stationery, I was that one kid in class with, if not fancy, a cute pencil case, different kinds of pencils instead of the standard Nataraj, erasers shaped as fruits, animals or just printed with cartoons, collecting pretty junk for crafts, covering the school diary (which wasn’t standard. We were free to decorate!) with a pink sheet, pasting cut outs of graphic drawings and practicing cursive writing on the cover pages, getting pinkish and cuteish stuff as gifts whenever dad made any trip. Ever since I remember, I’ve always had a personal notebook. The one stacked in between other books and retrieved time and again to jot down anything interesting I came across, or thought of. The name of an interesting movie, quotes from Children’s Digest I liked, books I’ve read and want to read (yeah :P ), anything and everything. I’ve lost most of them, for there was always a new one.

I don’t think I ever finished any one of them. If there was a new one which was cuter than the previous one, I’d shift. Of course, I’d first make promises and classify the notebook for a certain something. ‘This is going to be my quotes book’ or ‘this one will be only about books’, but I’d end up jotting down just whatever I wished. Two days ago a friend told me of a 75% discount on books in those Mediamart kiosks at metro stations. While returning from college, I picked up a book on palmistry for mom (who reads such stuff for time pass) and just then I was drawn to a different shelf with different kinds of notebooks. The plain school kind, the spiral, college kind and then those with Superman, Batman, Barbie on them! I had a two minute mental debate over Superman/Batman for my brother, who isn’t very fond of notebooks as such, but he always appreciates whatever I get for him. And I figured it’d be a nice reminder of the childhood days. As for me, I had been deliberating over the idea of having an ‘idea notebook’ handy, since while travelling when I’m in the ‘relaxed’ mode, I do get a lot of funny, weird but workable ideas for writing. And I tend to forget those very soon. So I picked up a small purple notebook for the purpose and yeah, it’s still unused but looks very cute. ;)

The idea notebook! :D


My property, y'know?


This morning I picked it up to jot down story ideas and as I opened up to the first page, feeling that surge of excitement that comes with something new, already imagining all the spectacular ideas the book would contain, feeling the cardboard and paper beneath my fingers, all smooth and perfect for writing, it simply made me remember all the wonderful similar feelings I’ve always had previously. Thankfully, I still had a few of those notebooks, which I took out and went through again. Ah, the memories! ^_^

Starting with the earliest (among those I’ve got still), this one was gifted to me by an aunt in Ludhiana when we visited their place, once upon a time in 2002 when I was 10 going on 11, and the first entry is a recollection of our trip to Amritsar and how I came upon that diary.

Cute! :D


In case you're wondering, I've deliberately messed up the details!


It’s funny to see my kiddish handwriting, trying to describe everything as it was, crossing out a wrong spelling and following it with the correct one. Here’s a small sample: “When we reached Amritsar and when we were near the hotel, we stopped to see the Jalianwala Bagh. I had never been to Amritsar. This was the first time I went. My father took me (^ inserted: and my family) there. There, we saw many things like the place from where the britishers (small b overlapped with a capital B) fired their guns at innocent people, the place where the britishers (forgetting to overlap this one with a capital B) fired on the walls ie, the spots of guns  bullets on walls and one wall has’nt changed.

One more: “We went to Golden Temple. There were many people rushing. First, we had to walk a long distance to enter it. It was at in the middle of the Sarovar. It was made of gold. We enjoyed very much. We saw Ber trees also. My father told me a story of that tree and in the last he told me that it was a magical tree. My mother and I washed our hands and faces in the Sarovar under the Ber tree.”

Not to be narcissistic or anything, but I think I was a pretty cute 10 year old. A few pages on, dated August 2005, I’ve written how my brother made a ruckus one evening and how I hate him for it. That was the time when dad had to go on an official trip and he asked me to write down whatever trouble I had and he’d see it when he returned (the awesome days when cell phones weren’t stuck to our ears). It’s heart-warming to just see the change in one notebook. A few years on, in a more controlled and better cursive, I’ve made a list of ‘Books I long to read’, following it with some quotes I made up and the stories behind them. I wonder if kids these days even make any memories this way. I don’t think digital devices can make up for it in any way.

Pink love ^_^
Then there was this pink one featuring Barbie, which did not seem enough and so I pasted more Barbie stickers on the cover. This was when I wondered if I could write a diary entry every day. Turns out I could not, because I skipped a lot of days and then just stopped. But it’s funny and nostalgic to read about high school and homework issues, how my class was suspended for three days for scribbling on our school shirts and I was scared as hell.

While in college, I got this one with a Hannah Montana pop-up on the cover. And yeah, a heart-shaped mirror too. I used to be a huge HM fan while in school, never missing those episodes. HM was the reason I was glued to Disney channel. This one contains self-motivating stuff. Lists of things I can do, those I’m proud of, those I wish to do. The first cover is full of HM stickers too and the first line reads, “If life is a journey, then your vision is a picture of your destination”, dunno where I sourced it from.

Hannah Montana :D


Inside first page!


Apart from these, there have always been notebooks for other stuff, like I mentioned earlier. I was gifted this pink one by my dad when he went abroad and got it for me! I admit, I am a miser when it comes to using it, considering how it’s so cute and all and I don’t want to finish it soon. This one is mostly bookish and the first thing I did with this was to do a mind-map for ideas for my book blog (back when I just had to start Journal ofa Bookworm). The red one is my present, favourite notebook. I’ve covered the first page text leaving only my name, because it’s got all sorts of dreams and secrets. ;)


As I’m writing, I’m remembering others I’m missing, those I haven’t located today, but I know they’re somewhere near, just out of sight. I love all of them to bits. I can be weird in a lot of ways, but who cares? This weirdness defines me. Do you have any such fetish?  


Wednesday, June 6, 2012

Vacation thingy: Crafting!

Finally! 
The last date of my year end exams was 18th May. I went to the library on 19th where I found an interesting book on papier mache, the fun craft we did when we were kids! I was so intrigued by those wonderful illustrations and the easy to understand guide to do everything related to papier mache (The Art and Craft of Papier Mache by Juliet Bawden), I decided to have fun with this craft this vacation! 

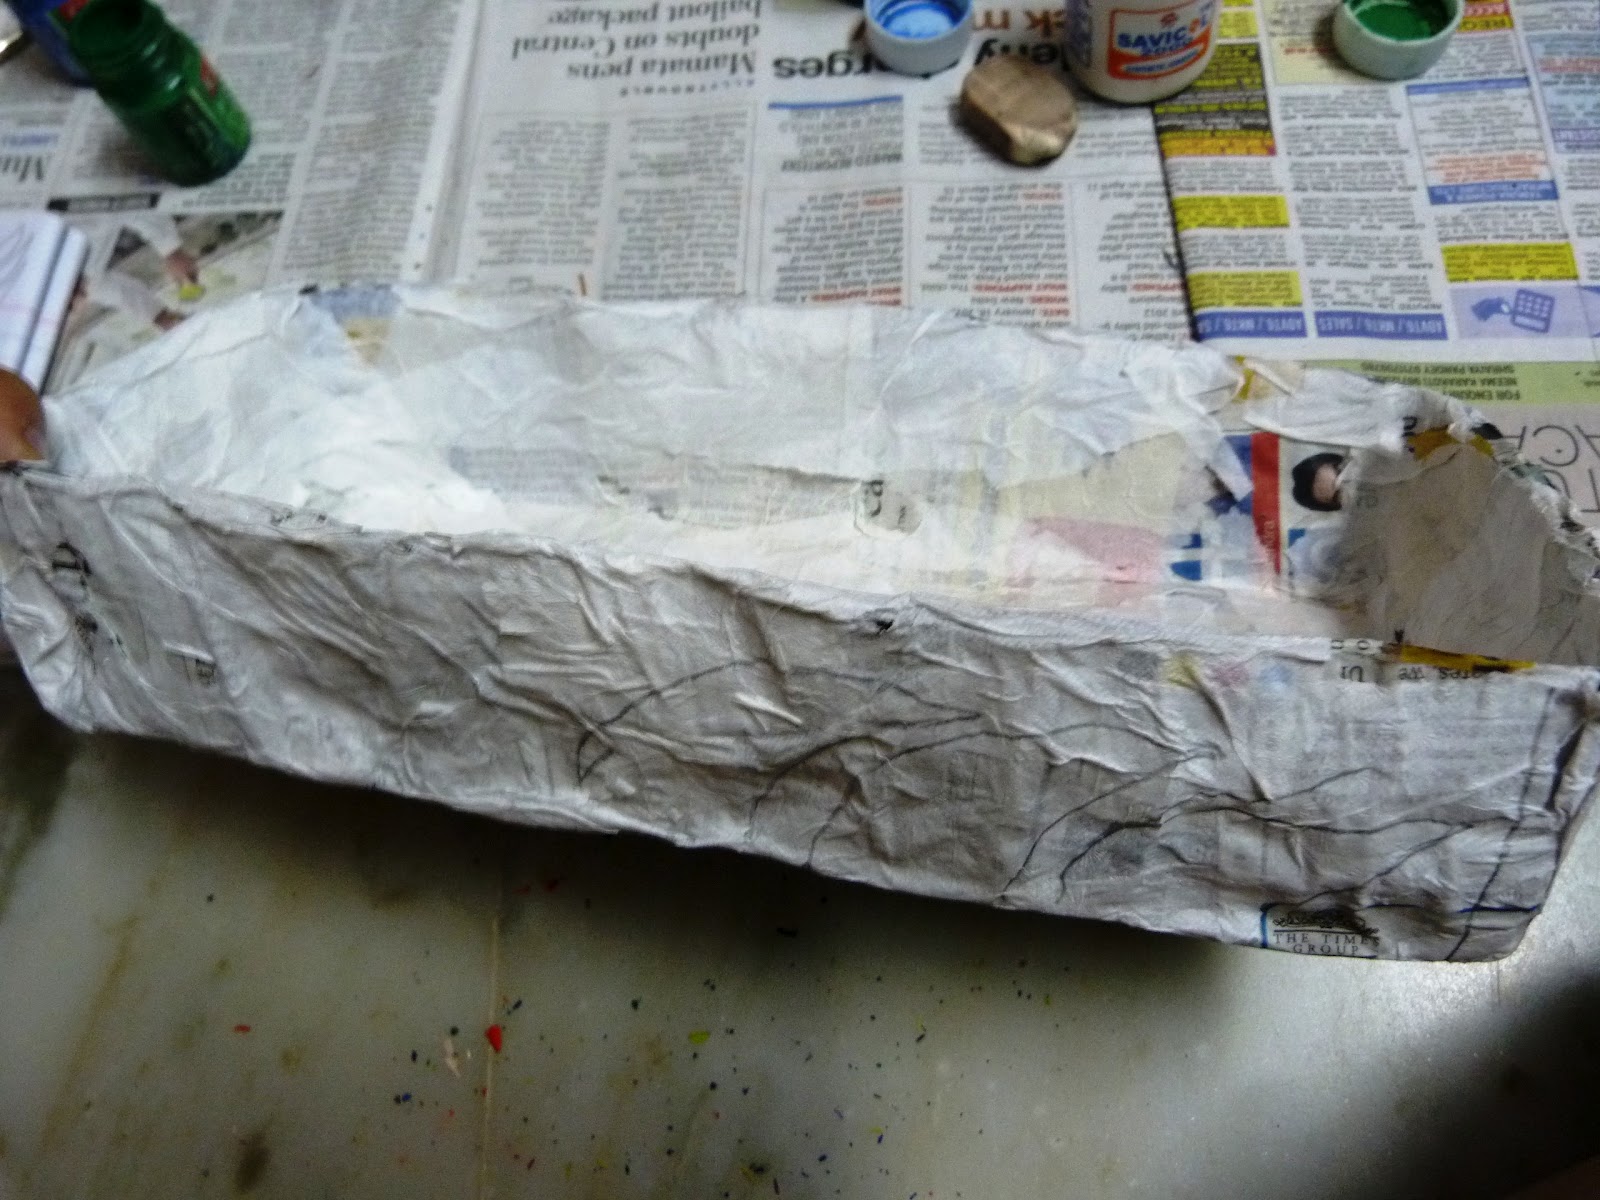
I guess I started on 20th May, with a basic experiment in mind. First I wanted to make sure if I could create something that's strong and sturdy, using the right materials and what kind of stuff I could make. So, I started with a shoe-box and used the layering method. Being the careful freak that I am, I used a generous 8 layers over four solid days (it takes time because each layer has to dry before we can apply the next. And oh, also because I'm a lazy bug who went on a 'reading' break after pasting each layer, with each break lasting longer than it should! :P). Then I left it to dry completely so that it gets really hard and unbreakable. Maybe a week more!

Then it was time to remove the shoe-box and have the solid paper in shape. Thankfully, the shoe-box came off easily, but the layers were so dry that the newspapers were peeling off! Not wanting to waste my ten days worth of time and effort, I put in glue wherever required and for good measure, added another layer, this time with light tissue paper and kept it to dry for another four days! I got around to the decoration part today, when the boredom seemed to be crossing its danger line, so I collected everything required and began with it. Three hours into it and here's the result! :D

The front view


The side view...

I'm very happy with this result, primarily because it's my own design! I mean, there wasn't a mention of a shoe-box in the whole book! I had the shape ready and solid, but didn't know what to do with it. What to make of a shoe-box shape? A tray? Nah! This idea just came from nowhere and I liked it. Initially it looked like this: 


Then, since I would have had to get up, switch on the laptop, then wire in the internet to look for a design, I  totally gave up the idea of Googling. All that effort for a design? When will my brain be of any use? I sketched a rough design in a notebook and went with it, not bothering with more designs to choose from (see how lazy I can get? :|) But then, I liked the idea of bold shapes and colors and a demonic face and it turned out so cool, so I forgive myself! Laziness can really bring out your creativity, right? ;).  

The design was made with a pencil, then colored with poster colors and this was the shoe-box-shaped-my-first-papier-mache-art-object-of-this-vacation!

It looked as if something was missing, so I added even more 'boldness' to it by outlining the features with a black felt tip marker! Then it was all done! :) Tell me what you think of it! And oh, if any of you decide to create something yourself, don't use tissue paper as the last layer, like I did, because it gets all crumpled up and the surface isn't smooth. But of course, if you're wanting something that will look good with a rough surface, use it! Though using markers would be tough too, because of the surface being uneven. I'll be using computer paper for the last layer next time. :)


Apart from the wall hanging thing, I thought it would suit me well. You know, bring out my personality if I wore this as a mask so that people know how I really am from the inside ;)


It was just fun! I had thought waiting for days to let it dry would leave me dry, but with so many books to read (yay vacation!) and the sense to start with another object for this craft, it didn't matter much. I love the end result so it's alright! :D

LinkWithin

Related Posts Plugin for WordPress, Blogger...